Posts tagged ‘Rye flakes’

Apple-Cranberry Crisp

Apple crisp is one of my favorite desserts because its easy, using only few ingredients, and fairly healthy too. Of course, we love to make it less healthy by pairing the hot  juicy apples with ice cream! Hehe. It also makes the house smell fabulous! Usually I use rolled oats for the topping, but since I’m trying to use what I have, I used rye flakes instead. It is still good, but the rye flakes are much harder than oats. Next time I may try to break them up some in the mixie (food processor) first.

Here is what I did:

  • 5 medium apples, peeled, cored and sliced thinly (I used a combo of honey crisp, granny smith, golden delicious, and stayman winesap)
  • 1/3 c cranberries
  • lemon juice – 1/2 lemon or less as needed
  • 1 TBS sugar  *You may want to add more if your apples are very tart or you like things more sweet*
  • generous sprinkle of cinnamon
  • generous sprinkle of cornstarch

Topping:

  • 1/2c flour
  • 1/4c rye flakes (or rolled oats)
  • 2 Tbs brown sugar *This makes it mildly sweet. Add another Tbs if you like*
  • 3 Tbs cold unsalted butter (if your mixture is not crumbly, you may need another Tbs of butter)
  • pinch of salt

Butter a deep pie dish and preheat the oven to 375.

Put the apple slices in the pie dish and sprinkle them with lemon juice so they do not turn brown, and I like the tartness the lemon gives also. Toss them around and add the sugar and cinnamon, then the cornstarch and toss around again. Sprinkle the cranberries over the top. Cornstarch will make the juices released from the apples to thicken, and so will the pectin in the cranberries. The cranberries also give another level of flavor which I really enjoyed, especially with the sweetness of the ice cream we had it with.

Mix the ingredients for the topping in a bowl, using your fingers to break up the butter and squish it into the rye/flour making a crumbly texture. You may also use a fork or a pastry cutter for this.  Pour the mixture evenly over the top of the apples in the pie dish.

Place the pie dish on a metal baking sheet to prevent any possible spill overs. Bake in the oven for about 30 minutes or until the topping is golden and the apples are bubbling up.

Let it cool at least 10 minutes before eating, but its best while still warm!  Especially with vanilla or cinnamon ice cream!

Sending this to Hearth and Soul and to Decidely Healthy or Horribly Decadent
Hearth n' Soul Blog Hop at A Moderate Life

Molasses Wheat Sandwich Bread with Rye Flakes

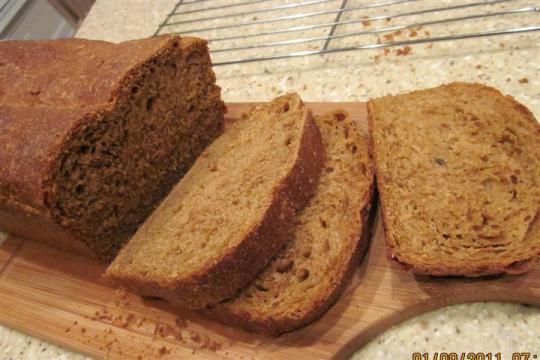
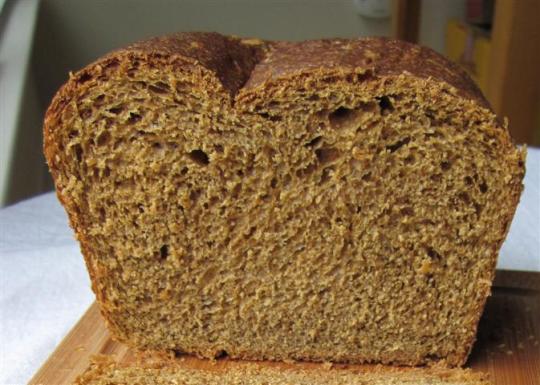
Don’t ask me how rye flakes ended up in my pantry. Sounds healthy enough, but I have no idea what to do with them! I read that they can be interchanged with oat so I was thinking I could put them in bread, since part of my goal this month is to bake my own breads. I took a nibble, and it didn’t taste too strong so I went ahead with it. I even ventured to make up a bread recipe loosely based on other ones I found that were not quite what I wanted. A bit of a risk since Im a novice bread baker. But to my surprise it turned out really good!  The rye flakes themselves give a pleasant grainy flavor and texture to the bread, but I have to say, they are much firmer than oat meal which more or less disappears into the bread. We liked the added bite it gives. I read about soaking whole grains to bring out their sugars and flavors. So I did that, not sure if it made a difference.

Here is what I did:

  • 1c white wheat flour
  • 1/3c rye flakes
  • 3/4c hot water

Combine the three and keep in the fridge overnight. Take out about an hour before starting the rest of the dough so it comes to room temperature.

  • 1/4c warm water

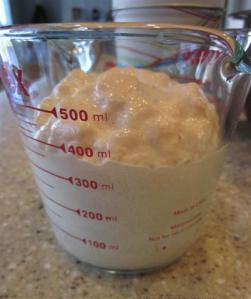
    Check out the crazy franken-yeast!

  • 1 packet active dry yeast
  • 1 tsp sugar

Combine and let bloom for 10 minutes till frothy.

Mix yeast water with the soaked flour above. I used my hand to get it well incorporated. Then add:

  • 1/4c molasses (or a mix of molasses and honey for a milder sweeter taste)
  • 3TBS melted butter or oil

Stir well then add in:

  • 2c bread flour
  • 1 1/2 tsp salt

Put the salt on top of the flour and mix it in. I did this to minimize salt contact with the yeast, since salt can kill yeast (and Im paranoid about that).

Knead the flour making a soft dough, add more flour if necessary. Knead for 10 minutes. Place in a greased bowl and roll around to coat the outsides. Cover with a damp cloth and keep in a warm place for 1-1.5 hrs till almost doubled.

After I had already shaped my loaf, I found this wonderful video with very helpful hints.(It is more clear than my explanation)

Press the dough into a rectangle shape and fold it into thirds. Let rest 10 minutes then take the small rectangle with the narrow edge in front of you and roll it very tightly, keeping surface tension on the outside of the dough. Pinch together the end. Roll your hands over it a few times to even it out.(mine was uneven, so I wish I had seen this in time. Still tasted fine!) Then place in a greased 9×5 loaf pan, cover loosely and let rise till it crests above the rim of the pan(mine took almost 2 hours in the cold weather). (Most recipes say to cover with plastic wrap but I never buy that. This time what I did is use the plastic bag from some tortilla wraps that we had finished and it works really well. I just put the whole loaf pan inside and sealed it.) Slit down the middle with a very sharp knife (optional).

Preheat oven to 350 during last half hour of rising time.  Bake 40-45 mins until golden, pulled away from sides of pan, and sounds hollow when tapped on the bottom. Cool on a wire rack.

Taken the next day in better lighting

I’m sending this to Yeastspotting on Wild Yeast Blog!

I’ve also joined forces at the breadmaking blog to Bake my own bread in 2011 (BYOB)! What a wonderful concept.

BYOB